Have you ever experienced your computer overheating or shutting down unexpectedly? This could be due to a malfunctioning or inadequate CPU fan. The CPU (Central Processing Unit) fan is responsible for keeping your computer’s processor cool and preventing it from overheating. It is an essential component of your computer’s cooling system, and its proper functioning is crucial for the overall performance and longevity of your device.
But how do you know if your CPU fan is working effectively? How can you measure its performance and make sure it is doing its job properly?
In this article, we will discuss the importance of measuring your CPU fan, provide a step-by-step guide on how to measure it, and explore different tools and techniques for accurate measurements.
We will also highlight common mistakes people make when measuring their CPU fans and offer tips on choosing the right measurement method for your specific needs. So, let’s dive in and learn how to measure your CPU fan like a pro!
Contents
Why Measure CPU Fan?

Before we delve into the technicalities of measuring your CPU fan, let’s first understand why it is essential to do so. As mentioned earlier, the CPU fan plays a crucial role in maintaining the temperature of your computer’s processor. If the processor gets too hot, it can cause damage to the internal components, leading to system crashes, data loss, and even permanent hardware failure.
Furthermore, a malfunctioning CPU fan can also result in reduced performance and slower processing speeds. This is because when the processor reaches a certain temperature, it automatically slows down to prevent overheating, resulting in a slower overall performance. Therefore, measuring your CPU fan’s performance is crucial to ensure that your computer is running smoothly and efficiently.
The Importance of Measuring Your CPU Fan
Measuring your CPU fan’s performance allows you to monitor its effectiveness and identify any potential issues before they escalate. It also helps you determine if your current cooling system is adequate for your computer’s needs. By regularly measuring your CPU fan, you can ensure that it is functioning correctly and prevent any potential damage to your device.
Moreover, measuring your CPU fan can also help you optimize its performance. By understanding how your fan is performing, you can make necessary adjustments to improve its efficiency and keep your computer running at its best. This can be particularly useful for gamers or those who use their computers for intensive tasks such as video editing or graphic design, where the processor is under constant strain.
Step-by-Step Guide to Measuring Your CPU Fan
Now that we understand the importance of measuring your CPU fan let’s take a look at how you can do it yourself. Follow these simple steps to measure your CPU fan’s performance accurately:
Step 1: Gather the Necessary Tools
To measure your CPU fan, you will need a few tools, including a temperature monitoring software, a screwdriver, and a thermal paste (optional). You can choose from various temperature monitoring software available online, such as Core Temp, HWMonitor, or SpeedFan. These programs provide real-time temperature readings of your CPU and other components, allowing you to monitor their performance.
Step 2: Prepare Your Computer
Before you start measuring your CPU fan, make sure your computer is turned off and unplugged. It would be best if you also grounded yourself by touching a metal object to discharge any static electricity. Once you are ready, open your computer’s case by removing the side panel with a screwdriver. This will give you access to the internal components, including the CPU fan.
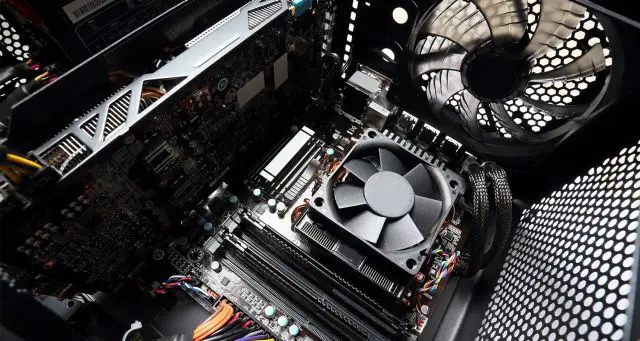
Step 3: Locate Your CPU Fan
Once the case is open, locate your CPU fan. It is usually situated on top of the processor and has a large heatsink attached to it. The fan may also have a plastic shroud covering it, which you can remove by unscrewing it.
Step 4: Clean Your CPU Fan
Before taking any measurements, it is essential to clean your CPU fan and heatsink thoroughly. Dust and debris can accumulate on the fan blades and heatsink, hindering their performance. Use a can of compressed air or a soft brush to remove any dust and dirt from the fan and heatsink. You can also use a small amount of rubbing alcohol to clean the thermal paste from the processor and heatsink if necessary.
Step 5: Measure the Temperature
Once your CPU fan is clean, it’s time to measure its temperature. Turn on your computer and let it run for at least 15 minutes to reach its normal operating temperature. Then, open your chosen temperature monitoring software and take note of the readings. The ideal temperature for a CPU fan is between 30-40 degrees Celsius when idle and 50-60 degrees Celsius under load. If your fan’s temperature exceeds these ranges, it may be a sign of inadequate cooling or a malfunctioning fan.
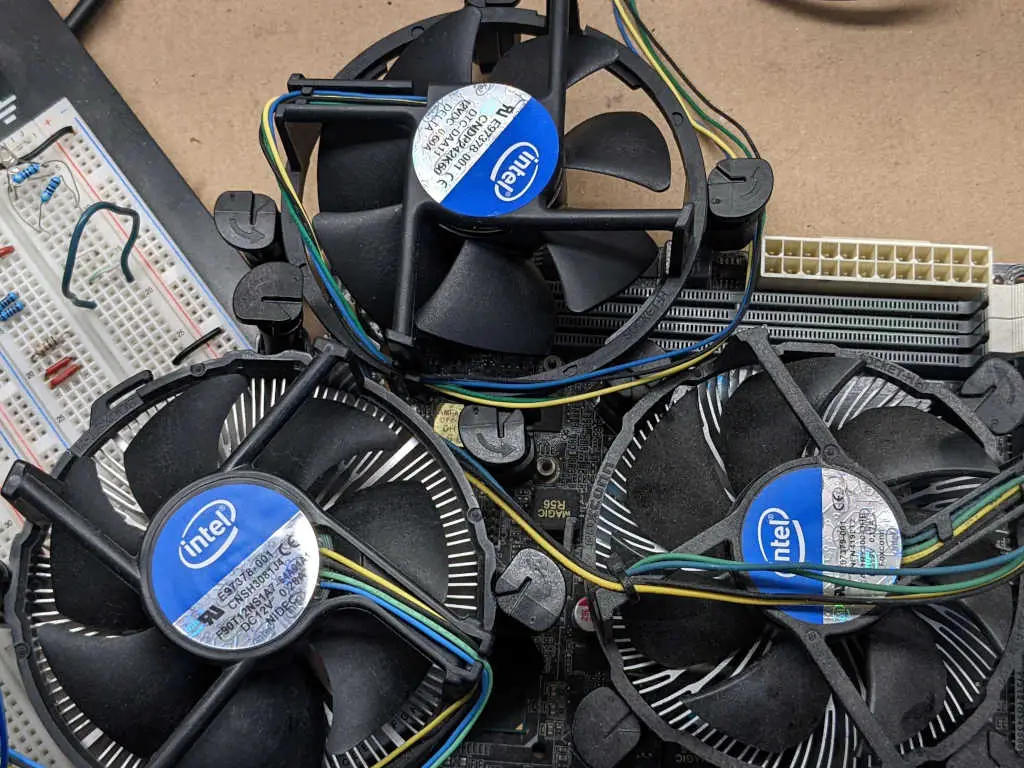
Step 6: Monitor the Fan Speed
Apart from temperature, it is also crucial to monitor your CPU fan’s speed. The fan speed is measured in rotations per minute (RPM) and indicates how fast the fan is spinning. Higher RPM means that the fan is working harder to cool down the processor. Most temperature monitoring software also displays the fan speed, allowing you to keep an eye on it while measuring the temperature.
Step 7: Reapply Thermal Paste (Optional)
If you notice that your CPU fan’s temperature is higher than the recommended range, you may need to reapply thermal paste. Thermal paste is a heat-conductive material that helps transfer heat from the processor to the heatsink more efficiently. Over time, this paste can dry out or become less effective, resulting in higher temperatures. You can purchase thermal paste from any computer hardware store and follow the instructions on the package to apply it correctly.
Tools and Techniques for Measuring CPU Fan Performance
Apart from the temperature monitoring software, there are other tools and techniques you can use to measure your CPU fan’s performance. These include:
Infrared Thermometer
An infrared thermometer is a non-contact device that measures surface temperatures by detecting infrared radiation. It can be used to measure the temperature of your CPU fan without having to open your computer’s case. However, this method may not provide as accurate results as using a temperature monitoring software.
BIOS
You can also check your CPU fan’s performance through your computer’s BIOS (Basic Input/Output System). The BIOS is a program that runs when you start your computer and controls the hardware components. Most BIOS systems have a section dedicated to monitoring the CPU fan’s speed and temperature, allowing you to check its performance without any additional tools.
Fan Speed Controller
A fan speed controller is a device that allows you to manually adjust the fan speed according to your needs. This can be particularly useful if you want to increase the fan speed during intensive tasks or decrease it for quieter operation. However, this method requires some technical knowledge and may not be suitable for beginners.
Common Mistakes When Measuring CPU Fans

When measuring your CPU fan, there are a few common mistakes that people make, which can affect the accuracy of their measurements. These include:
Not Cleaning the Fan
As mentioned earlier, dust and debris can accumulate on your CPU fan, hindering its performance. Therefore, it is crucial to clean your fan thoroughly before taking any measurements. Failure to do so can result in inaccurate readings, leading to incorrect conclusions about your fan’s performance.
Using Inaccurate Tools
Using an inaccurate tool, such as a regular thermometer, can also affect the accuracy of your measurements. Make sure to use a reliable temperature monitoring software or other recommended tools to get precise readings.
Not Letting the Computer Reach Normal Operating Temperature
It is essential to let your computer run for at least 15 minutes before taking any measurements. This allows it to reach its normal operating temperature, providing more accurate results.
How to Choose the Right Measurement Method for Your CPU Fan
With various tools and techniques available for measuring your CPU fan, it can be challenging to determine which method is best for you. Here are a few factors to consider when choosing the right measurement method for your specific needs:
Ease of Use
If you are a beginner or do not have much technical knowledge, using a temperature monitoring software may be the easiest option for you. It provides real-time temperature readings and does not require any additional tools or skills.
Accuracy
For more accurate results, using a temperature monitoring software or BIOS is recommended. These methods provide precise readings and allow you to monitor your CPU fan’s performance over time.
Cost
Some methods, such as using an infrared thermometer or fan speed controller, may require purchasing additional tools, making them more expensive. If you are on a budget, using a temperature monitoring software or BIOS may be a more cost-effective option.
Video
Conclusion
Measuring your CPU fan’s performance is crucial for ensuring that your computer runs smoothly and efficiently. By regularly monitoring its temperature and fan speed, you can identify any potential issues and take necessary measures to prevent damage to your device. With the step-by-step guide and tips mentioned in this article, you can now confidently measure your CPU fan like a pro. Remember to keep your fan clean, use reliable tools, and choose the right measurement method for your specific needs. Happy measuring!

Information Security Asia is the go-to website for the latest cybersecurity and tech news in various sectors. Our expert writers provide insights and analysis that you can trust, so you can stay ahead of the curve and protect your business. Whether you are a small business, an enterprise or even a government agency, we have the latest updates and advice for all aspects of cybersecurity.