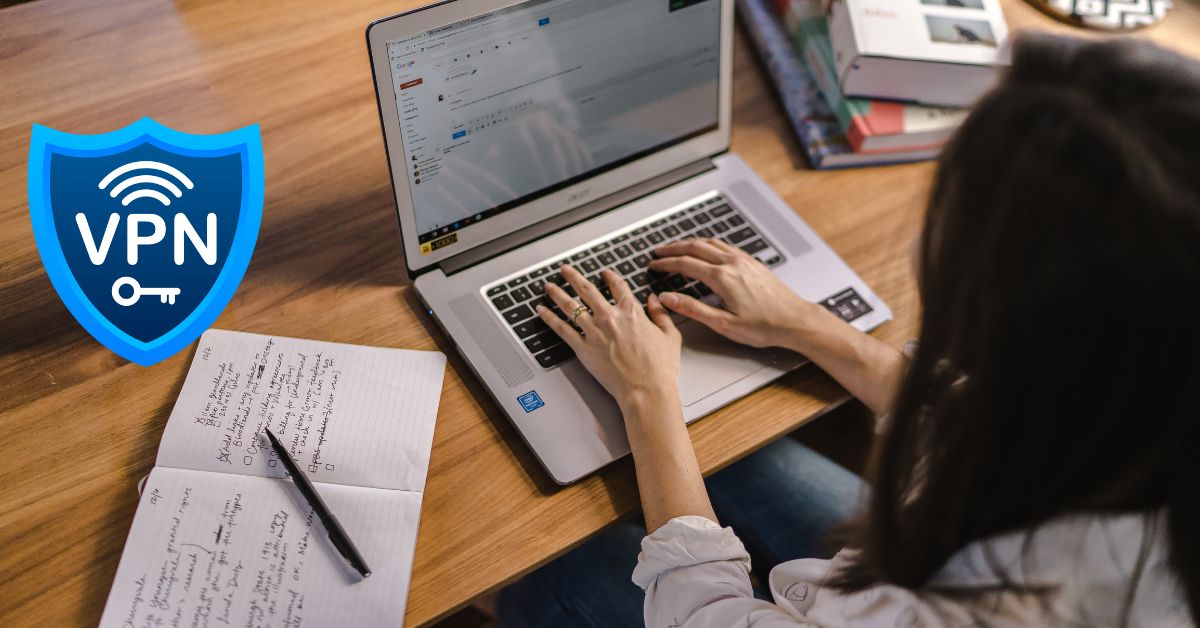
How to get VPN on school Chromebook? Are you stuck at school, desperately wanting to use a VPN but your school chromebook won’t let you? Well then this blog post will serve as the ultimate guide on how to get around these pesky restrictions and install a VPN on your device!
We’ll take an in-depth look at which services are the best for bypassing strict firewalls, explain all of the important steps involved in getting it set up correctly, and also provide insider tips so that you can stay one step ahead of any potential network blocks. So no matter if you just want to browse privately or check out sites otherwise inaccessible on campus – follow along and learn how to get yourself a secure connection right away.
Let’s jump right into it!
Contents
- What is A VPN?
- What is A Chromebook?
- Why You Want To Install VPN on Chromebook
- How to Get VPN on School Chromebook
- Benefits & Drawbacks of Getting VPN on School Chromebook
- Frequent Asked Questions
- Can I install any VPN on my school Chromebook?
- Are there any free VPNs I can use on my school Chromebook?
- Can I use a browser extension instead of a full VPN client?
- How do I know if a VPN is safe and secure?
- Can I get in trouble for using a VPN on my school Chromebook?
- How do I know if my school allows the use of VPNs?
- Do I need to be tech-savvy to install a VPN on my Chromebook?
- Will a VPN slow down my internet connection?
- Can I use a VPN on my personal device to access the internet through a secure connection?
- Can a VPN protect me from all online threats?
- Conclusion
What is A VPN?
A VPN, or Virtual Private Network, is a technology that allows you to create a secure connection over the internet between your device and a remote server. This connection is encrypted, which means that any data transmitted between your device and the server is protected from eavesdropping or tampering.
VPNs can be used for a variety of purposes, including:
- Security: VPNs are commonly used to protect sensitive data when using public Wi-Fi networks, as they can prevent attackers from intercepting your data.
- Privacy: VPNs can also be used to hide your IP address and online activities from your ISP, government, or other third parties.
- Accessing restricted content: VPNs can be used to bypass geo-restrictions and access content that may be blocked in your location.
What is A Chromebook?
A Chromebook is a type of laptop computer that runs on the Google Chrome operating system (OS) instead of a traditional desktop operating system like Windows or macOS. Chromebooks are designed to be highly affordable, fast, and easy to use, and are typically used for browsing the web, checking email, and running web-based applications.
One of the key features of Chromebooks is that they rely heavily on cloud-based computing. This means that instead of storing files and software directly on the device, users typically save their data and applications to online services like Google Drive or Dropbox. This approach allows Chromebooks to be highly portable and lightweight, with many models weighing in at less than 3 pounds.
Another advantage of Chromebooks is that they come with built-in security features, including automatic updates and virus protection. Because they are designed to run web-based applications, Chromebooks are less vulnerable to malware and other types of attacks that can affect traditional desktop operating systems.
Chromebooks are a popular choice for individuals and organizations looking for a low-cost, easy-to-use computing solution that emphasizes simplicity, speed, and security.
Why You Want To Install VPN on Chromebook
There are several reasons why you might want to install a VPN on your Chromebook:
- Security: A VPN can help protect your internet activities from being intercepted or monitored by hackers, government agencies, or other third parties. By encrypting your connection and routing your traffic through a remote server, a VPN can help keep your online activities private and secure.
- Accessing geo-restricted content: Many streaming services and other online platforms are only available in certain countries or regions. You can bypass these restrictions by using a VPN to connect to a server in a different location and access the content you want.
- Public Wi-Fi safety: When using public Wi-Fi networks, your data can be vulnerable to interception by hackers. A VPN can help secure your connection and prevent unauthorized access to your online activities.
- Bypassing Internet censorship: In some countries, the government may restrict access to certain websites or online services. By using a VPN, you can bypass these restrictions and access the content you want.
Installing a VPN on your Chromebook can provide an extra layer of security and privacy to your internet activities, while also giving you greater flexibility and access to online content.
How to Get VPN on School Chromebook
Getting a VPN on a school Chromebook may require a bit of effort, as many schools have restrictions in place to prevent students from installing software or accessing certain websites. Here are a few methods you can try:
- Check with your school: Some schools may allow students to use VPNs for legitimate academic or research purposes. Check with your school’s IT department to see if they have any policies in place.
- Use a browser extension: Some VPN providers offer browser extensions that can be installed directly in Chrome. These extensions typically offer limited functionality compared to a full VPN client, but they can be a good option for accessing restricted content or browsing more securely.
- Use a web-based VPN: There are a number of web-based VPN services that can be accessed directly in your Chrome browser. These services typically require no installation and are free to use, but they may have limited bandwidth or be less secure than a full VPN client.
- Use a personal device: If you have a personal laptop or mobile device, you can install a VPN client on that device and use it to access the internet through a secure connection. However, be sure to check your school’s policies on personal devices before attempting this method.
It’s important to note that attempting to bypass your school’s internet restrictions may violate school policy and result in disciplinary action. Be sure to follow your school’s guidelines and use any VPN services responsibly.
Contacting School IT Support
If you want to get a VPN on your school Chromebook, it is recommended to contact your school’s IT support directly for guidance and assistance. They will be able to provide you with the necessary information and instructions specific to your school’s network and policies. Here are some steps you can follow to contact your school’s IT support:
- Check for any provided contact information: Start by checking your school’s website or any student resources for information on how to contact the IT support team. Look for an email address, phone number, or help desk portal.
- Send an email or submit a support ticket: If you find an email address or a help desk portal, use that method to reach out to the IT support team. Clearly explain your request to install a VPN on your school Chromebook and mention any specific VPN software you are interested in using.
- Be respectful and follow school policies: Make sure to be respectful and follow any guidelines or policies your school has regarding the use of VPNs. It’s important to remember that some schools may have restrictions in place for security or content filtering purposes.
- Follow instructions from IT support: Once you’ve contacted the IT support team, they will guide you through the process of installing and configuring a VPN on your school Chromebook, if it is allowed. They may provide you with specific VPN recommendations or instructions on how to set it up.
Remember, it’s essential to comply with your school’s policies and regulations regarding the use of technology.
Using a VPN Chrome Extension
Using a VPN Chrome extension on a school Chromebook can be a convenient way to access a VPN service. Here’s a general guide on how to do it:
- Check school policies: Before proceeding, review your school’s acceptable use policy or any guidelines related to internet usage. Some schools may have restrictions or prohibitions on using VPNs, so it’s important to understand the rules.
- Visit the Chrome Web Store: Open the Chrome browser on your school Chromebook and go to the Chrome Web Store (https://chrome.google.com/webstore).
- Search for a VPN extension: In the search bar of the Chrome Web Store, type “VPN” or the name of a specific VPN service you want to use. Examples of popular VPN extensions include “Hotspot Shield,” “ExpressVPN,” “NordVPN,” and “TunnelBear.”
- Choose a VPN extension: Browse the search results and choose a VPN extension that suits your needs. Look for extensions with good user ratings, a substantial number of installs, and positive reviews.
- Install the VPN extension: Click on the VPN extension you have selected, and on the extension’s page, click the “Add to Chrome” button. Confirm any permissions that the extension requires.
- Configure the VPN extension: After the extension is installed, you may need to go through a brief setup process. This usually involves creating an account with the VPN service or signing in if you already have an account.
- Connect to a VPN server: Once the setup is complete, you should see the VPN extension icon in the top right corner of your Chrome browser. Click on the icon to open the VPN extension’s interface. From there, you can select a server location and click on a “Connect” or similar button to establish a VPN connection.
- Verify the VPN connection: Once connected, the VPN extension icon should change to indicate that you are connected to a VPN server. You can usually hover over the icon to see your new virtual location.
It’s important to note that some VPN extensions may have limitations or require a subscription for full access to their features. Additionally, not all VPN extensions are equally secure or reliable, so choose one from a reputable provider.
Setting Up VPN via Android Apps
Setting up a VPN on a school Chromebook using an Android app involves a slightly different process. Please note that this method requires your school Chromebook to support Android apps. Here’s a step-by-step guide:
- Check Android app support: Confirm that your school Chromebook supports Android apps. You can do this by going to “Settings” and looking for the “Google Play Store” option. If it’s available, click on it and follow the prompts to enable Android app support.
- Install a VPN app: Once Android app support is enabled, open the Google Play Store on your Chromebook. Search for the VPN app you want to use, such as “ExpressVPN,” “NordVPN,” or any other VPN provider you prefer. Install the VPN app by clicking on the “Install” button on the app’s page.
- Launch the VPN app: After the VPN app is installed, click on the “Open” button from the app’s page in the Google Play Store, or you can find the app in your Chromebook’s app launcher and click on it to open it.
- Set up the VPN app: When you launch the VPN app for the first time, you will likely be prompted to create an account or sign in if you already have one. Follow the instructions provided by the app to complete the setup process. This typically includes selecting a server location or other preferences.
- Connect to a VPN server: Once you have configured the VPN app, you will be presented with a list of server locations or a connect button. Select a server location that you want to connect to and click on the “Connect” button to establish a VPN connection.
- Verify the VPN connection: After connecting, the VPN app will display a confirmation message or indicate that you are now connected to a VPN server. You may also see a key or lock icon in the status bar of your Chromebook indicating the active VPN connection.
It’s important to remember that using VPNs on school devices may be subject to your school’s policies and regulations. Be sure to review your school’s acceptable use policy or consult with your school’s IT support if you have any concerns or questions about using VPNs on your school Chromebook.
Using Linux on Chromebook
Using Linux on your school Chromebook provides another option to set up a VPN. However, please note that enabling Linux on a Chromebook may require administrative access or permission from your school’s IT department. Here’s a general guide on setting up a VPN using Linux on a Chromebook:
- Enable Linux on your Chromebook: First, you need to enable Linux support on your Chromebook. To do this, go to “Settings” > “Linux (Beta)” and follow the on-screen prompts to install Linux on your device. This process may take some time.
- Install a VPN client: Once Linux is enabled, open the Linux terminal by searching for “Terminal” in the app launcher. In the terminal, you can install a VPN client by using a package manager like APT or Snap. For example, to install the OpenVPN client, you can run the following command:
sudo apt-get install openvpnAlternatively, you can install VPN clients provided by specific VPN service providers by following their instructions. They may have their own Linux-compatible client or provide instructions to set up the connection manually. - Configure the VPN client: After installing the VPN client, you will need to configure it with the necessary settings provided by your VPN service. This typically involves obtaining configuration files or specific connection details from your VPN provider.
If you’re using OpenVPN, you will typically need a configuration file (usually with a .ovpn extension) from your VPN provider. You can then use the openvpn command in the terminal to initiate the VPN connection, specifying the path to your configuration file. - Connect to the VPN: With the VPN client configured, you can establish a connection by running the appropriate command in the Linux terminal. For example, if you’re using OpenVPN, you can run:
sudo openvpn /path/to/your/config.ovpnFollow any prompts or enter credentials if necessary to complete the connection process.
- Verify the VPN connection: Once the connection is established, you should see log output indicating a successful connection. You can also check your IP address or visit websites like whatismyip.com to confirm that your traffic is being routed through the VPN.
Please keep in mind that using VPNs on school devices may be subject to your school’s policies and regulations. Ensure that you review your school’s acceptable use policy and consult with your school’s IT support if you have any concerns or questions about using VPNs on your school Chromebook.
Configuring VPN on Router
Configuring a VPN on your home router can enable VPN protection for all devices connected to the network, including your school Chromebook.
However, please note that configuring a VPN on your home router requires administrative access to the router and may vary depending on the router model and the specific VPN service you are using. Here’s a general guide to configuring a VPN on a router:
- Choose a VPN service: Select a VPN service that offers support for router configurations. Some popular VPN services that provide router setup instructions include ExpressVPN, NordVPN, and CyberGhost.
- Check router compatibility: Verify that your router supports VPN configurations. Not all routers are VPN-compatible, so check the router manufacturer’s website or consult the router’s documentation to determine if it supports VPN setups.
- Obtain VPN configuration details: Sign up for a VPN service and gather the necessary configuration details. This typically includes the VPN server addresses, connection protocols (such as OpenVPN or L2TP/IPsec), and any required authentication details or certificates provided by your VPN service.
- Access router settings: Open a web browser on a device connected to your home network and enter your router’s IP address in the address bar. This IP address is usually printed on the router or can be found in the router’s documentation. Enter your router’s administrative username and password to access the settings.
- Locate VPN settings: Look for the VPN or similar section in your router’s settings. The location and labeling of this section may vary depending on your router’s firmware. Common labels to look for are “VPN,” “OpenVPN,” “PPTP,” or “L2TP/IPsec.”
- Enter VPN configuration details: In the VPN settings, enter the VPN server addresses, connection protocols, and any other required details as provided by your VPN service. These details are typically found in the VPN service’s setup guides or your account dashboard.
- Save and apply settings: After entering the VPN configuration details, save the settings and apply them. Your router will likely need to restart or apply the changes before the VPN connection can be established.
- Connect your school Chromebook: Once the router’s VPN settings are saved and applied, connect your school Chromebook to the Wi-Fi network provided by your router. All devices connected to that network should now be protected by the VPN.
Remember that configuring a VPN on your home router affects all devices connected to the network, including devices other than your school Chromebook. Additionally, using VPNs on school devices may be subject to your school’s policies and regulations. Review your school’s acceptable use policy and consult with your school’s IT support if you have any concerns or questions about using VPNs on your school Chromebook.
Benefits & Drawbacks of Getting VPN on School Chromebook
There are both benefits and drawbacks to getting a VPN on a school Chromebook:
Benefits:
- Increased privacy and security: By using a VPN, you can encrypt your internet traffic and prevent it from being intercepted by hackers or other third parties. This can help keep your online activities private and secure.
- Access to restricted content: Some websites or online services may be restricted by your school’s internet filters. By using a VPN, you can bypass these restrictions and access the content you want.
- Protection on public Wi-Fi: If you use your Chromebook on public Wi-Fi networks, a VPN can help protect your connection from being intercepted by hackers or other third parties.
Drawbacks:
- Violation of school policies: Some schools have policies in place that prohibit the use of VPNs on school-owned devices. Using a VPN in violation of these policies could result in disciplinary action.
- Slower internet speeds: When you use a VPN, your internet traffic is routed through a remote server, which can result in slower internet speeds. This can be particularly noticeable on slower internet connections.
- Cost: While some VPNs are free, many of the more secure and reliable options require a subscription fee. This can be an additional expense for students and families.
While getting a VPN on a school Chromebook can provide increased privacy and access to restricted content, it’s important to weigh the potential benefits against any potential drawbacks and consider your school’s policies before proceeding.
Frequent Asked Questions
Can I install any VPN on my school Chromebook?
It depends on your school’s policies. Some schools may allow the use of VPNs for legitimate academic or research purposes, while others may prohibit the use of VPNs altogether.
Are there any free VPNs I can use on my school Chromebook?
Yes, there are some free VPNs available that can be used on Chromebooks. However, these services may have limited bandwidth, slower speeds, or be less secure than paid VPN services.
Can I use a browser extension instead of a full VPN client?
Yes, some VPN providers offer browser extensions that can be installed directly in Chrome. These extensions typically offer limited functionality compared to a full VPN client, but they can be a good option for accessing restricted content or browsing more securely.
How do I know if a VPN is safe and secure?
Be sure to do your research and choose a reputable VPN provider that offers strong encryption, a no-logging policy, and reliable servers. Look for reviews and recommendations from trusted sources.
Can I get in trouble for using a VPN on my school Chromebook?
If your school has policies in place that prohibit the use of VPNs, using a VPN in violation of these policies could result in disciplinary action.
How do I know if my school allows the use of VPNs?
Check with your school’s IT department or review the school’s acceptable use policy to see if they have any policies in place regarding VPNs.
Do I need to be tech-savvy to install a VPN on my Chromebook?
Installing a VPN on a Chromebook can be a relatively straightforward process. Most VPN providers offer easy-to-follow instructions and support.
Will a VPN slow down my internet connection?
When you use a VPN, your internet traffic is routed through a remote server, which can result in slower internet speeds. However, the degree of slowdown can vary depending on the VPN provider and the server you connect to.
Can I use a VPN on my personal device to access the internet through a secure connection?
Yes, if you have a personal laptop or mobile device, you can install a VPN client on that device and use it to access the internet through a secure connection.
Can a VPN protect me from all online threats?
While a VPN can help protect your internet traffic from interception and monitoring, it’s important to remember that it’s not a cure-all for online security. Be sure to practice good online hygiene, use strong passwords, and stay vigilant against potential threats.
Conclusion
In conclusion, getting a VPN on a school Chromebook can provide increased privacy and security, access to restricted content, and protection on public Wi-Fi. However, it’s important to consider your school’s policies and weigh the potential benefits against any potential drawbacks, such as slower internet speeds or disciplinary action for violating school policies.
If you decide to install a VPN, do your research and choose a reputable VPN provider that offers strong encryption, a no-logging policy, and reliable servers. Always practice good online hygiene and stay vigilant against potential threats.
Reference

Information Security Asia is the go-to website for the latest cybersecurity and tech news in various sectors. Our expert writers provide insights and analysis that you can trust, so you can stay ahead of the curve and protect your business. Whether you are a small business, an enterprise or even a government agency, we have the latest updates and advice for all aspects of cybersecurity.